Showing posts with label Reduce Reuse and Recycle. Show all posts

Wednesday, November 3, 2010

Shutter Envy

That's what you'll have after I tell you how much I paid for these beauties! My mouth almost hit the floor when she told me the price at the counter... don't know about you, but when thrift stores/garage sales don't have their things marked they are usually expensive or I'm too scared to ask- I know I'm lame and shy. :) This time I'm glad I asked! And I may now be encouraged to ask every time...

79 cents!!!!
that's $1.58 total $1.71 if you guesstimate WA sales tax in there (No clue what I actually pay now, I need to stop moving!)

Seriously.  That's less than $2 for this delicious soon-to-be-something-great-in-my-house.  Shutter envy I know!

And here's where you come in...

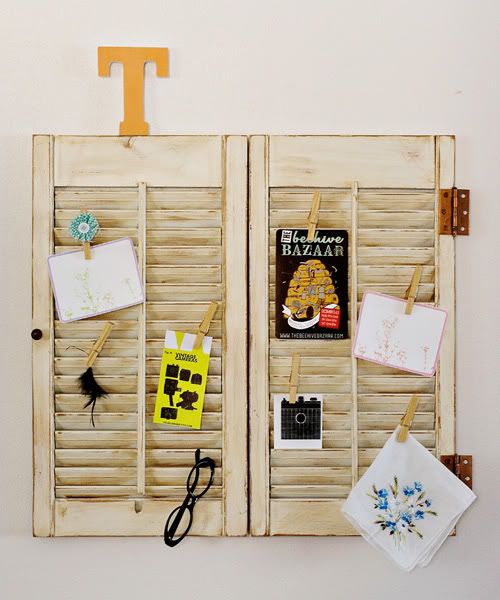
I have Shutter Envy with all of these amazing shutter projects...

This one from Tortoise and the Hare...

And because of my terminal rental status, I can only dream of this one found at Olive and Love...


Love what Paisley Wallpaper did with her shutters here.

And what Allison at A Glimpse Inside did with her shutters- love the color contrast!

Or this creative clutter hider at Crafty Nest...

Or this great message board at How Does She?

Now I have some serious shutter envy! I could go on and on, but Target is calling and I must respond!

What to do, what to do...  Thoughts?

Tuesday, October 19, 2010

Nightstands Turned Shelf!

I found this random junk pile in a soon-to-be neighborhood near us while looking for blackberry bushes one day. 

No wonder people put up signs like this!
I really don't get why anyone would just dump their things on someones property, there are so many places to drop off unwanted goods.  Sadly I found this hot spot after it had rained for a couple days, so I missed out on a couple great and fun chairs that were water-logged. :(

But I did find this beauty. 

Ok really I didn't find it like this I found two nightstands looking much like this only way dirtier and with weird flying bugs crawling on it! Seriously the things I will do for a free item- I question my sanity sometimes!

To turn it from 2 of those to this...

Recruit some free labor...

1.  Prepare the furniture- Clean and Sand.
The pieces that I found were nightstands with drawer units.  I couldn't find the drawers in the mass mess, so I had to remove screws and drawer stoppers. 

2.  Assemble your shelf.  Stack the 2 pieces, use wood glue and glue the top to the bottom, then attach the 2 pieces with a flat metal bracket, see a similar one called a Flat joining plate.  (sorry I didn't get a picture of mine!)  I used one bracket with 4 holes placed horizontally between the 2 nightstands.  2 screws going into each nightstand.


3. Glue 4 wood shelves into place.  I used 1/4" plywood found in the scraps section at Home Depot and had them cut down the scraps to the size I needed.  I paid $1.00 total for them and the cuts- big spender I know! :)

Two of my shelves were a little off so I had to use some heavy-duty sand paper and sand them down to be even with the nightstand. (as seen in above photo)

4.  Much to your hubby's dismay paint your beauty spicing up your boring white-walled rental! 

I used a foam roller and a cheapo foam brush and it left a great finish- no priming here. :)

5.  Finish shelf backing.  I took the false bottoms from the original nightstand, cut 2 of them down to size with the jig-saw.  Shh... don't tell the hubby I used it while he wasn't here- he gets a little worried with me and power tools especially since we live in the boonies.  And his worry is probably rightfully deserved- I am the daughter of the same man who lost parts of fingers on 2 separate occasions! 1st to a cement mixer when he was in his 20's and the 2nd time to a table saw while working on the cabinets for our basement bathroom. And I most definitely carry his clumsy genes! Phew that was a tangent! Back on track...

I wasn't too worried about the appearance so I put a light coat of paint on both sides then covered the board with fabric.  I used hot glue to secure it to the back side of the board, wrapping it like a present. 

6.  Attach shelf backing.  I attached the 4 different backing pieces using a heavy duty staple gun. 

7.  Move your shelf on inside and decorate!

This one will end up in my daughters room and will most likely be adorned with a plethora of toys plus a couple extra goodies.  Just need to find some better baskets! :)


Final cost of this project was approximately $7.00!
Nightstands= FREE!
Shelves= $1.00
Quart of Paint= $4.00 (purchased from habitat restore!)
Fabric=~$2.00 (probably less, fabric was clearance at JoAnn's about a year ago!)

This most definitely was a hodge-podge project and tutorial, so please ask if you need more info on any particular step!

AND if you made it all the way to here, I've got another super great labor intensive project that I just finished last night as well! I'll try to get it up soon! :)

UndertheTableandDreaming

UndertheTableandDreaming


Saturday, October 9, 2010

Mirror Redo

I'm absolutely loving the intricate frames right now!


This one fit in well with my Message Board Frame (turned menu board) and received the same blue spray paint treatment, but before we see the final product can we talk about what we see in the mirror!? I am absolutely loving our new surroundings! I love the fact that we can take little "hikes" all around our neighborhood, I love that I look out my window and see pine trees all around, and I love that it smells like camping in my very own house! So try to look past the beauty in the reflection and check out that mirror!


Friday, October 1, 2010

Shop is up and running and other random cuteness!

A couple months later I finally have my shop back up and running! Hooray! I feel almost silly posting this here, because I've already sold a bundle of cozies I had listed, but there's still some cute one's left and really let's be totally honest I'm not sure how much traffic my poor neglected blog generates! I will be adding some cute upcycled market bags, and some other goodies over the next couple weeks so we'll have more than just cozies! :) Now everyone pray we won't have anymore moves for AT LEAST 8 more months and that any moves around that time will be to a house of our own or I'd even settle for on the same side of the country!

In all other randomness...

Craft show last weekend was a great experience, but all I can do is tell you about it because I failed big time and got NO PICTURES! But no worries, I'm headed to the farmer's market this weekend in my hometown, so that'll be the first thing I do.  Hopefully I can duplicate our booth from last weekend because (skipping all humility here) it was adorable! Looking forward to hanging with my sis at our booth and crafting some more!

Here's your reward through making it through all that nonsense, or if you skipped over my wordiness just enjoy the goods, but (self-promotion here!) go check out my updated shop!

I scored these ugly-color-cool-looking candle sticks at goodwill

and turned them into...

Why are there only 2? My sis broke one last week, but have no fear I went back and bought the remaining one at goodwill, it's still in the process of be repainted!

Love them!

Friday, September 17, 2010

Wine Bottle Fountain

My Brother-in-law just put this rockin' Wine Bottle Fountain together last week... gorgeous don't ya think!? Perfect item for Washington Wine Country!  He will be selling them at local craft fairs and by request. 

Friday, August 20, 2010

Bathroom Wall Hanging Tutorial

In a quest to spruce up the bathroom I took a piece I already had, Hallie's hair bow holder, which I wasn't in love with and turned it from 

Drab...


To fab...

Love bathroom lighting, someday I may be smart enough to really be able to counter the nasty bathroom lighting effect with Mr. Canon, but until then we'll just take it outside. :)


Here's the tutorial...

Supplies

12x12 Basic Wood Frame- Found at most craft stores, for around $7, use 40% coupon and love your savings!
12x12 cardboard (thick), cork board, foam board, wood, etc. 
Spray paint
Hot Glue
Double sided sticky tape

14x14 piece of fabric- fat quarter would be great for this!
2 Contrasting Fabric strips- 2x44"
Coordinating Ribbon/embellishments

Felt or other backing fabric

Getting Started:

1.  Spray Paint Your Frame Front, back and sides in a well ventilated area- please.  And keep those kiddos away! If they are like mine, they'll be instantly attracted to it- "5 steps back! Go go go!" But hopefully they can't count and you lose track. :)


2.  Iron the heck out of your 14x14 piece of fabric- my piece is not 14x14, it was the only scrap I had left.  You'll basically just want to make sure that your fabric is big enough to cover the front and sides of your cardboard/foam/cork board plus about 2 inches. 
3.  Use Double-sided sticky tape on the front side. Lay your cork board on top of the fabric and press it down evenly.  This will help your fabric stay put.  I love Wonder Tape, this stuff takes the sticking business seriously. (and sadly I'm not being paid to say that!)  I would have used a bit more, but I used the last off my roll, and I live in the boonies now so no more quick craft store/target runs for this girl anymore.  :( 
***Before going any farther, let's talk about the cork board/cardboard/foam board/wood.  Use what you have, what's easiest for you to find.  I used cork board, because that's what I had in the frame beforehand.  Any of the above will work just fine, my only recommendation is make sure the cardboard is thick enough.  For stability you probably want it to be around 1/4" thick.  And make sure it will hold up to any moisture you may have in your bathroom! :)***

4.  Wrap your board like you would a present.  Use glue around the edges.  I used quick grip (love this stuff!), but you could use your hot glue gun as well.  I glued all the way around the edge of the board and pulled the fabric tight as I folded it over the edge.  Then glue the "flaps" down to the back of the board. 

Ignore the glue gun in the pic, that's a later step, just wanted to show you the back wrapped like a present.  Nice even ugly edges- scrap piece remember.  Yours can be pretty and even if you start with a 14x14 piece of fabric. :)
5.  Now it's time to embellish your board.  Have fun with this one.  It took me a full day of playing with it here and there to figure out what I wanted to put on there. 

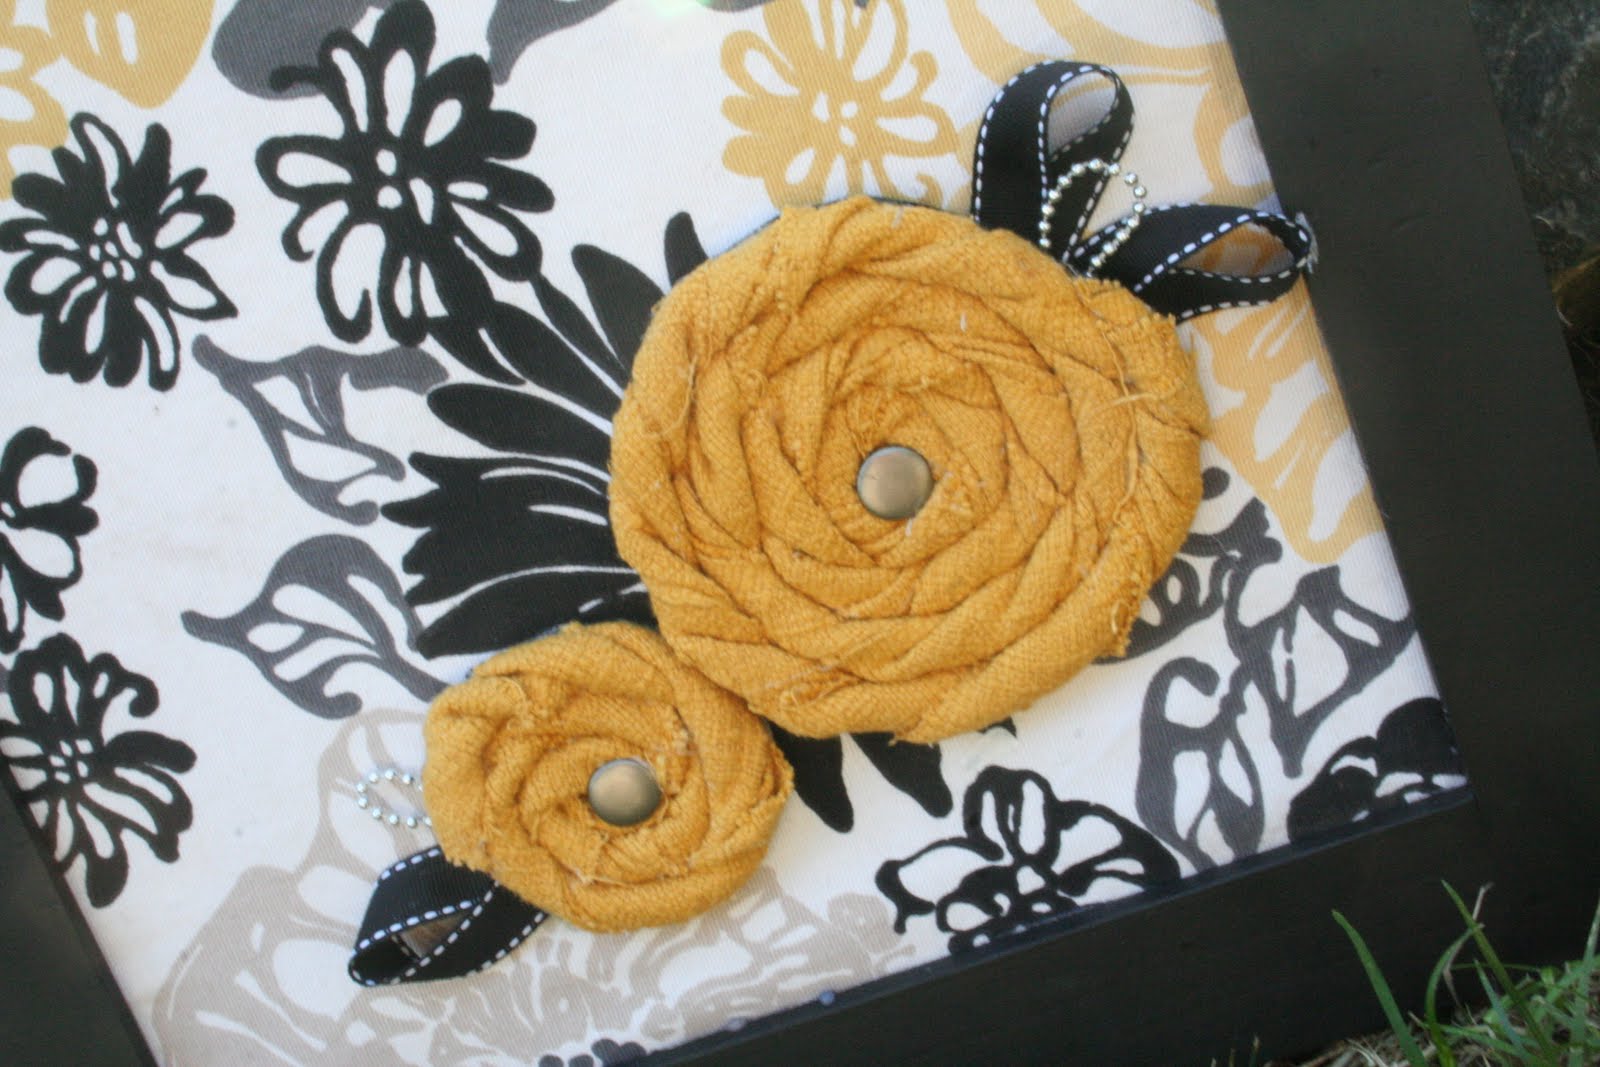
6. Make Fabric Flowers

7.  Glue brads, beads, or sparklies to your flower.  Figure out arrangement, then glue ribbon petals, beads, and flowers to your board.  Make sure you pick off all of the little glue drops! I see I missed a couple... oops. :)


8. Use hot glue to attach the cork board to the frame.


9.  Make sure your doggies are under control and snap a 1000 pics of your cute new wall hanging!


Linking here...
UndertheTableandDreaming Photobucket
  Keeping It Simple 


Thursday, July 22, 2010

Princess Chair "Revamp"


We don't despise princess related things in our house, but it's not exactly our favorite.  We are more rough and tumble, with some girly thrown in there for fun. So when we stopped in St. Louis at my aunts house on our last cross country move my cousin Gina, being the sweetheart she is, decided she had outgrown her chair and gave it to Hallie.  We were excited... Hallie loved sitting in it, in fact she loved everything that Gina had, and I was excited it was free! But it was a few years old and Gina had definitely put it to good use, so I decided to recover it. 

Sadly I didn't take a picture beforehand so here's a stock look alike. 

I broke out my trust friend, the seam ripper and went to work.  And seam ripping I did! I ripped out all of the old seams so I could use the old pad as a pattern.  So a few episodes of 24 later, I was done with the seam ripping. 

I then cut out my fabric, pretty, fun and not-so-princessy thrifted floral fabric on the top, and go-to sky blue on the bottom. 

I then basically made a slip cover for the old pad.  Reassembled the 2 cushions.  I was lazy and didn't finish the edges well, I may go back over them at some point with a zig-zag or overcasting stitch and make it a look a little nicer- or not since it's on the bottom. :)

I then took the old pieces that held the cushion onto the frame and made duplicates out of the blue fabric.  Then I broke out a few more episodes of 24 and hand sewed the pieces back around the frame.  A little time consuming, but it's adorable!