Tuesday, August 31, 2010

Take 3...

Are you sick of this picture yet!? I may be a semi-biased (ok prob a big time biased) mommy, but I still LOVE it!

I think I'm getting there with the right look?! I've learned so much about photoshop in the last 2 days and I don't think I've even scratched the surface...


One of these days I may actually get back to doing something really crafty, but sadly I'm kinda in a slump! I'm feeling a little overwhelmed- there's so much that could be done on the crafty list, that I don't know where to start.  And to top that off, I'm experiencing some fabric-cutting anxiety! Does anyone else get this... a great gorgeous piece of material and so many different options for cuteness, and then there's the whole 'what if I mess up' thought! Ugh! Silly I know, something I'm working on overcoming.  We've got a great fun weekend planned so crafting may be limited until next week... we'll see. :)

Monday, August 30, 2010

Take 2...


Photo Fun

We took a step back in time this weekend and rode a steam train in the foothills of Mt. Rainier.  It was a great afternoon, one we won't forget. Love those days! While waiting for our return train I snapped this classic photo... it's destined for our poor lonely white bare walls! So help me please! Any photo editing tips, any favorite tricks, tutorials?!
This is what I have so far, using the Photo Grunge Effect Tutorial

Original:
#1
#2
#3

Better? Too 'edited'? Favorite?

Friday, August 20, 2010

Bathroom Wall Hanging Tutorial

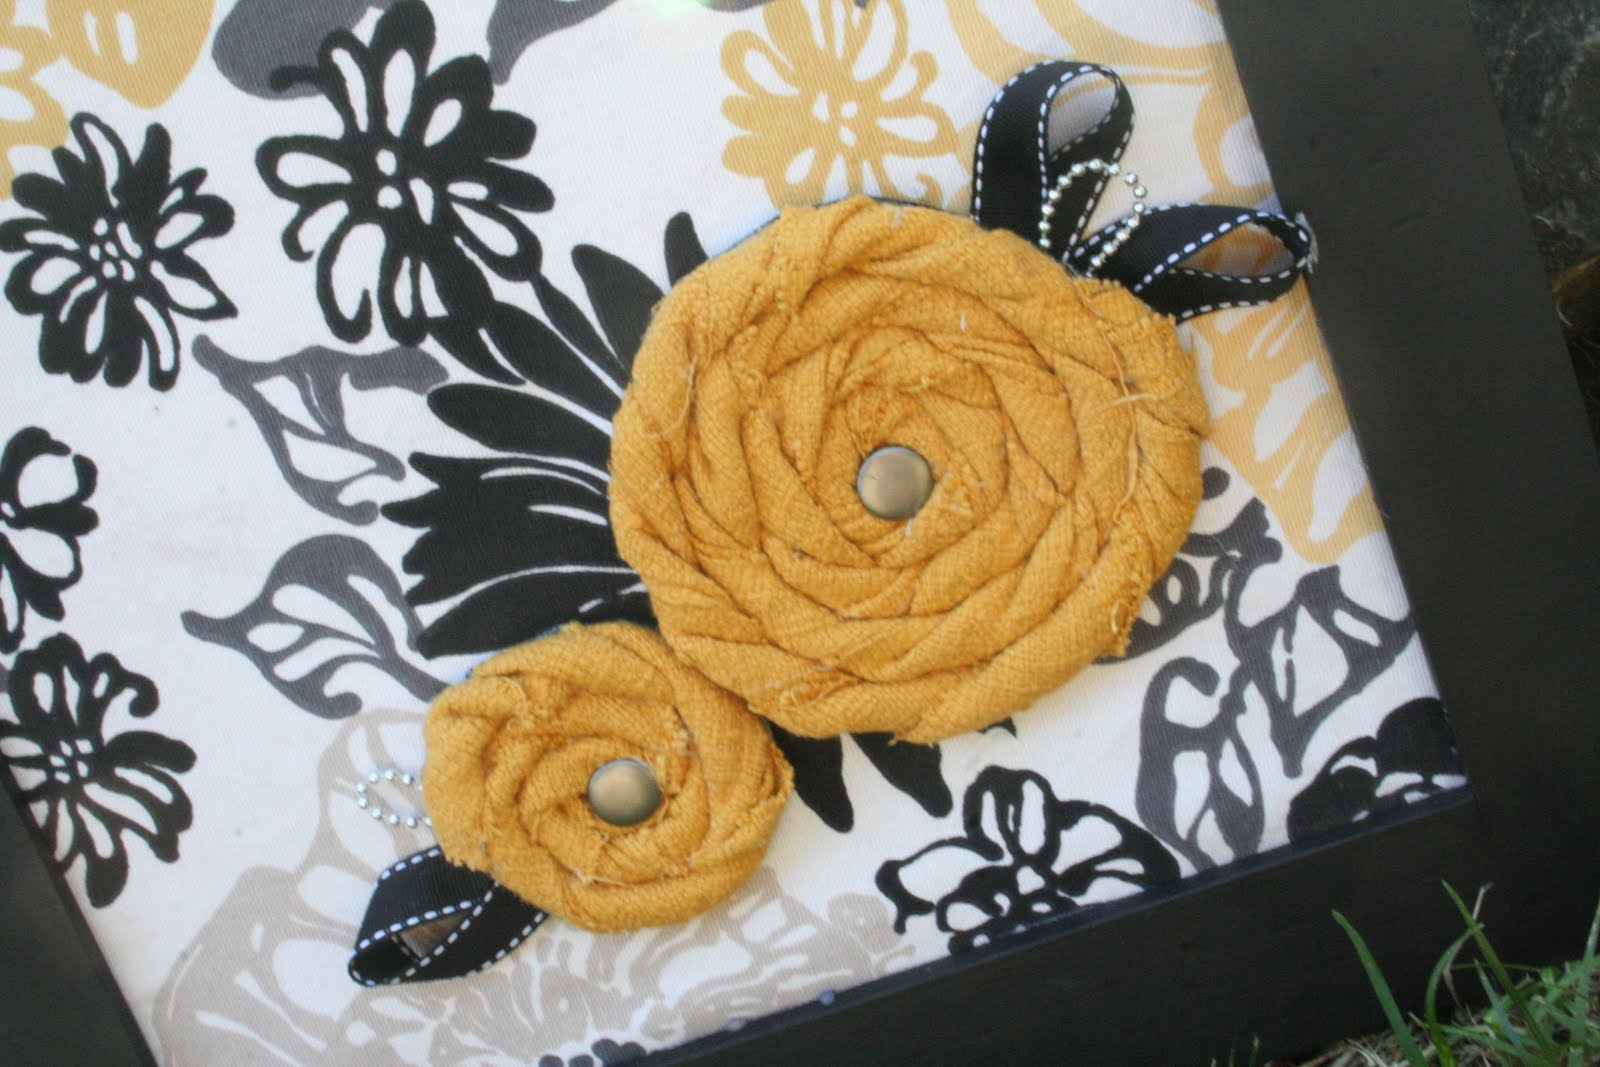
In a quest to spruce up the bathroom I took a piece I already had, Hallie's hair bow holder, which I wasn't in love with and turned it from 

Drab...


To fab...

Love bathroom lighting, someday I may be smart enough to really be able to counter the nasty bathroom lighting effect with Mr. Canon, but until then we'll just take it outside. :)


Here's the tutorial...

Supplies

12x12 Basic Wood Frame- Found at most craft stores, for around $7, use 40% coupon and love your savings!
12x12 cardboard (thick), cork board, foam board, wood, etc. 
Spray paint
Hot Glue
Double sided sticky tape

14x14 piece of fabric- fat quarter would be great for this!
2 Contrasting Fabric strips- 2x44"
Coordinating Ribbon/embellishments

Felt or other backing fabric

Getting Started:

1.  Spray Paint Your Frame Front, back and sides in a well ventilated area- please.  And keep those kiddos away! If they are like mine, they'll be instantly attracted to it- "5 steps back! Go go go!" But hopefully they can't count and you lose track. :)


2.  Iron the heck out of your 14x14 piece of fabric- my piece is not 14x14, it was the only scrap I had left.  You'll basically just want to make sure that your fabric is big enough to cover the front and sides of your cardboard/foam/cork board plus about 2 inches. 
3.  Use Double-sided sticky tape on the front side. Lay your cork board on top of the fabric and press it down evenly.  This will help your fabric stay put.  I love Wonder Tape, this stuff takes the sticking business seriously. (and sadly I'm not being paid to say that!)  I would have used a bit more, but I used the last off my roll, and I live in the boonies now so no more quick craft store/target runs for this girl anymore.  :( 
***Before going any farther, let's talk about the cork board/cardboard/foam board/wood.  Use what you have, what's easiest for you to find.  I used cork board, because that's what I had in the frame beforehand.  Any of the above will work just fine, my only recommendation is make sure the cardboard is thick enough.  For stability you probably want it to be around 1/4" thick.  And make sure it will hold up to any moisture you may have in your bathroom! :)***

4.  Wrap your board like you would a present.  Use glue around the edges.  I used quick grip (love this stuff!), but you could use your hot glue gun as well.  I glued all the way around the edge of the board and pulled the fabric tight as I folded it over the edge.  Then glue the "flaps" down to the back of the board. 

Ignore the glue gun in the pic, that's a later step, just wanted to show you the back wrapped like a present.  Nice even ugly edges- scrap piece remember.  Yours can be pretty and even if you start with a 14x14 piece of fabric. :)
5.  Now it's time to embellish your board.  Have fun with this one.  It took me a full day of playing with it here and there to figure out what I wanted to put on there. 

6. Make Fabric Flowers

7.  Glue brads, beads, or sparklies to your flower.  Figure out arrangement, then glue ribbon petals, beads, and flowers to your board.  Make sure you pick off all of the little glue drops! I see I missed a couple... oops. :)


8. Use hot glue to attach the cork board to the frame.


9.  Make sure your doggies are under control and snap a 1000 pics of your cute new wall hanging!


Linking here...
UndertheTableandDreaming Photobucket
  Keeping It Simple 


Shower Curtain

The bathroom at the house we just moved from was YELLOW, and I say yellow in all caps because it was wrapped in yellow tile 2/3rds of the wall high. It was like a yellow jacket threw up all over the walls. It was just YELLOW. Instead of my first instinct which was to rebel and decorate it with my staples of brown and blue, it just didn't seem right. So I embraced the YELLOW and went with it.  I created this shower curtain... and loved it! It was the perfect amount of calm amidst all the YELLOW.


Move on to our new bathroom, everything in the house is white. Basic oak cabinets and white... white everywhere! Gotta love rentals right!? :) 


Now sadly it's a little boring! But have no fear... I will have to get a little more crazy with the accessories! Stay tuned for accessory #1...

Thursday, August 19, 2010

Kid's Table Redo

I shared a link with you to Savy Chic Home with her {adorable} use of color on her kid's table.  I was so struggling with what to do to add some cuteness to M&H's table, I wanted to do something fun and bright, but still sophisticated enough to reside in the main living area of our house. 

So thank you Savy Chic Home! I now have a table that makes me smile every time I see it!
The hubster referred to the table as primary colors, silly boys this is WAY cuter than primary colors!

Here she sits on our porch until we get some better porch furniture...
Yup... still giddy inside, love it!

Tuesday, August 17, 2010

Bags, Bags, Bags

A girl can never have too many bags right!? I mentioned I scored on some cute fabric at a consignment store and I was in desperate need of a new diaper bag/mommy bag/purse, my old one had seen better days.  So I broke out some of my cheap cheap fabric- think $2.25 a yard for canvas with VERY generous measurements- think 1.5-2 yards measured at a yard... score!

I went freestyle on this one, so I'll be mixing up another and I'll share the tutorial with you when I can get'er done!

Here she is...


I added the contrasting fabric, but wanted something a little more than a regular strip of fabric, so I ruffled the band...


Added a signature flower with a pink button for some extra pop...


I love to open this bag! The inside is just as fun as the outside!


I really need to find a better place to take pictures in this house! But here she is in all her glory on my kitchen counter...


Happy Tuesday :)